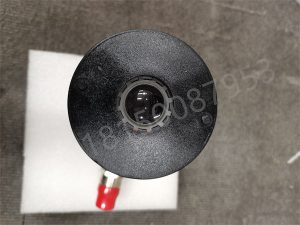
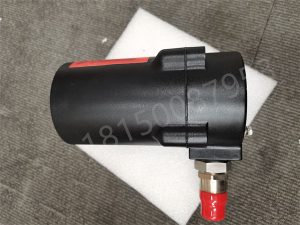
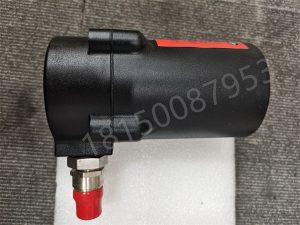
85UVF1-1QD FIREYE
If the flame length of the igniter is too short or in the wrong position to reliably ignite the main flame, it is considered that the igniter
The flame does not exist, thus preventing fuel from being transported to the burner.
Attention: Reliable operation should be achieved under all air flow and furnace loads
If the combustion air enters the furnace at a sufficient rotational speed, it will cause the igniter flame to deviate in the direction of rotation
The probe should be set at a position 10 to 30 degrees downstream of the igniter, close to the periphery of the burner throat where the ultraviolet radiation is at a high value. (As shown in Figures 3 and 4). After determining the appropriate

position of the observation tube, open an observation hole on the burner panel that allows the 2-inch tube to pass through. Observing from the hole, if the guide vane obstructs the view, its position should be adjusted to ensure unobstructed observation under all combustion conditions. Refer to the legend below.
Attention: Consult the burner manufacturer’s signal (within the fuel combustion range) before adjusting or removing the deflector.
When installing the probe, the selection method is to use a universal joint (P/N 60-1664-3, NPT, Figure 5). Firstly, align it with the 2-inch opening on the burner panel and secure it with three hexagonal bolts (not included).

Then install the observation pipe on the universal joint. If a universal joint is not used, insert the end of the observation tube directly into the opening, adjust it to a suitable angle, and then pre weld it (when welding, its strength must be able to temporarily support the weight of the installed probe). The observation tube should be inclined downward to avoid the accumulation of dirt and dust inside.
Note: The length of the 1-inch diameter observation tube should not exceed 1 foot. If the length increases by 1 foot, the diameter should be increased by 1 inch to avoid limiting the field of view of the probe.

After the satisfactory observation results are obtained through debugging, tighten the three hexagon screws on the universal joint to fix the position of the universal ball.
8. For ease of use, the probe should be installed on the observation tube so that the LED display is easy to read.
Note: The operating status of the LED is independent of its position.
9. The lens of the detector must remain unaffected by pollutants (oil, dust, soot, dirt). The shell temperature should not exceed 150 ° F (65 ° C). Excessive temperature can shorten the lifespan of the probe. Injecting continuous blowing air can meet these requirements. The purge air can be accessed from either the 3/8 “connector on the or the 1-inch connector on the” Y “tee in front of the universal joint. Refer to Figure 5. During installation, the blowing air can be connected only through the 3/8-inch interface on the probe body, or through the 3/8-inch interface or through the 1-inch “Y” tee interface. In the latter case, usually only one of the two interfaces is used for blowing air, while the other interface needs to be blocked.

When using a sealed connector (see Figure 7), the 1-inch interface on the “Y” tee needs to be connected to the blowing air, while the 3/8-inch interface on the body needs to be blocked. The use of sealed pipe fittings (part numbers 60-1199-1 with NPT threads) during installation is a good choice to prevent abnormal furnace pressure from damaging the probe’s sight glass. Under normal operating conditions such as clean fuel and moderate ambient temperature, a purge air flow rate of approximately 4 SCFM (133 liters/minute) can meet the requirements. If the fuel produces a lot of ash, soot, or high ambient temperature, the air volume needs to be increased to 15 SCFM (425 liters/minute) to maintain the temperature inside the probe within the allowable range of specifications.